Sandevistan offers a unique way to play Cyberpunk. Unlike other FPS games that offer different flavours of the same FPS combat strategy, i.e., move cover to cover, aim down sites, shoot the target, and use knives only when the enemy is unaware of your presence; this Sandevistan build in Cyberpunk allows the player to slow down time for all other entities around them except for themselves.
Slowing down the enemy allows the player to more readily approach melee combat in the game since dodging enemy attacks and bullets becomes feasible by zigzagging (a common strategy often used to improve survival in FPS multiplayer games).
There is also sentimental value in playing with a Sandevistan as it plays a large role in the story of Cyberpunk: Edgerunners which is a phenomenal anime based on the video game, highly revered among fans and is largely responsible for the revival of Cyberpunk 2077 after its rocky launch. Every element of this Sandevistan build connects or synergizes with another component, outside of the core elements, between perks, cyberware, and weapons there will be a fair amount of opportunity to create variants that suit your playstyle.
Best Attributes and Perks for a Sandevistan Build
Attributes are Cyberpunk’s version of skill trees, they represent areas in which you can grow your character. Unlike other games however, where all you need are skill points to progress in a skill tree, in Cyberpunk you need to use attribute points to first unlock parts of an attribute tree and then use perk points (skill points) to unlock the perks. The twist in Cyberpunk is, that there are not enough attribute points and perk points to unlock all five attribute trees and perks within them, this forces the player to think about which attribute they want to specialize in. If you’re unsure of how attributes and perks work, check out our in-depth article on the topic, for now, let’s see what the Sandevistan build needs.
The best combination is 20 Reflexes, 20 Technical Ability, and at least 15 Body, and the rest can be dumped into Cool while completely ignoring Intelligence as that is better suited to a Netrunner build which offers another playstyle completely and doing both together is not possible since using a Sandevistan (the foundation of this build) eliminates the possibility of using a Cyberdeck (the foundation of a netrunner build).
Body
Maxing out the Body attribute perk tree is useful for the health buffs, where each attribute point spent unlocking this tree offers a +2% Max Health increase. Make sure to unlock the Painkiller, Adrenaline Rush, and Pain to Gain nodes, the sub perks coming off these nodes will help too and though you might not be able to identify the improvement each sub perk offers however the rewards they offer do accumulate into a better experience in combat with faster health item regeneration and improved mitigation chances.
Reflexes
Maxing out the Reflexes is what makes this build unique, this build is focused on blades so definitely unlock the main blade perk nodes. The first one, “Lead and Steel” is ok but it is not really useful when the sandy is active. The next main perk node, “Finisher: Bladerunner” is absolutely necessary on harder difficulties, as the Sandevistan will turn off once the duration is over and although there will be no cooldown with this build, there is a small window of vulnerability, however this small window of vulnerability can be mitigated if it occurs during a finisher (which we can initiate voluntarily) since during a finisher the player is invulnerable, you can reactivate sandy towards the end of the finisher.
Unlocking the movement branch of the Reflexes perk tree is also integral to this build as it will allow you to make the most of the time in which the sandevistan is active by moving from enemy to enemy in rapid succession while delivering cuts and finishers to each one. There is a connecting perk named “Flash and Thunderclap” between the “dash” and “lead & steel nodes” which will allow you to leap from enemy to enemy within a small distance while delivering strong blows with the katana, saving you even more crucial time.
At the ends of the blade and movement branches in this tree are the “Slaughterhouse” and “Tailwind” perks respectively, these add buffs to already unlocked abilities in the lower part of the branches making them good optional perks but not necessary for the overall build to work. There is also the ”Stuntjock” perk on the bottom left corner of the whole Reflex attribute perk tree, unlock it if you like stylish ways of exiting vehicles, it does not offer much utility other than what the name implies.
Technical Ability
The Technical Ability attribute perk tree is primarily helpful in improving cyberware capacity and the cyberware itself. Though it might be easy to mistakenly assume its utility is relevant exclusively to the Netrunner build (though it is an extremely important part of it), upgrading technical ability is just as important for this build. The first node of the central branch, “All Things Cyber” is a must-unlock, and the “Chipware Connoisseur” sub-perk of this node will allow you an extra option while upgrading cyberware at the Ripperdoc using item components in your inventory which you can pick up as you play the game (the “Lucky Day” sub-perk of the same node will improve looting) or obtain by disassembling items you no longer need like lower tier clothes and guns; out of all the upgrade options available for the cyberware once this perk is active, prioritize the one with highest melee damage since this build is not about stealth but getting up close and personal with MaxTac with your Iconic Tier 5 Katana. The next node on the same branch is “Liscence to Chrome”, for one perk point it offers +10% to all cyberware stat modifiers, the reason to explicitly mention this is to clarify what this means as other perks also have similar benefits, what this does is affect the cyberware the Ripperdocs sell, i.e., the Rippers will sell you the same cyberware with bonus stats. The “Liscence to Chrome” node must be fully unlocked, doing so will allow access to the sub-perks “Extended Warranty” and “Cyborg” which will improve Sandevistan’s performance even further. Better to get the final node “Edgerunner” as well since it will allow you to exceed the Cyberware capacity by 50 points (a nod to David Martinez from Cyberpunk: Edgerunners and his high tolerance for cyberware), however, it also makes you susceptible to enter a “Fury” state which enables you to inflict even more damage to your opponent so there’s nothing not to like. The branch on the left with health buff nodes “Health Freak” and “Glutton for War” is optional to the build. The first two nodes offer health buffs for sure but the next node “Pyromania” has a connecting sub-perk to its corresponding center branch node called “Doomlauncher” which is a good optional investment since the build is predominantly melee and a buffed projectile launcher can come in handy while trying to eliminate targets that are hard to reach with a sword (turrets and cameras). The final node called “Ticking Time Bomb”, as the name suggests, emits an EMP every 3 seconds when the sandy is activated, this can be quite useful while dealing with larger groups or MaxTac on higher difficulties, it does however lead to a health drop when the EMP goes off so you might want to deactivate if that is affecting your playstyle negatively.
Cool
Anything left in attribute points and perk points should be directed to the Cool attribute perk tree and particularly toward the rightmost branch of this tree that impacts throwable weapons since this is a melee Sandevistan build and other than the projectile launcher, throwing weapons are the only option left for a quieter and more subtle ranged attack option. The first node “Scorpion Sting” applies poison to throwing weapons while unlocking sub-perks that also apply buffs to throwing knives like poison, blinding, and crit hits. The bottom left corner of the attribute tree has “Road Warrior” which will allow the sandy to slow time while driving, this is not important for this build but can be a fun addition.
Relic
The relic tree is unlocked at the start of the Phantom Liberty Expansion (which you most definitely should get) and requires you to collect Relic points from Militech Data terminals scattered around Dogtown. The most important perks to unlock for this sandevistan build in this tree are “Vulnerability Analytics” and “Machine Learning”, these perks will expose vulnerabilities on the enemy’s bodies as hollow red diamonds, and attacking them there will deal crit hits and additional damage. If more Relic points are available then go for the “Jailbreak” and “Launch Capacity Override” which further improves the Projectile Launcher by adding charge to it.
Best Cyberware for a Sandevistan Build
In this section, we will go from the most to least relevant cyberware for this build.
Militech “Apogee” Sandevistan
This is the best sandy in the game and you should upgrade this further at the Ripperdoc with 200 Tier 5 components (use those components for this before all else) as it gives a bunch of buffs like increased crit chance and damage, extended duration, and reduced cooldown phase. Other Tier 5 sandevistans can work with this build but the “Apogee” just works the best as it slows down time by 85% and has a very low 25 sec cooldown which we can shrink much more using cyberware like the “Axolotl”. This sandevistan will also increase duration and stamina on each neutralization and since it allows activation and deactivation at any charge level, it is best to turn it off while traversing empty spaces between enemies and reactivating as soon as you re-engage. These abilities make the “Apogee” the best candidate for the operating system cyberware for this Sandevistan build.
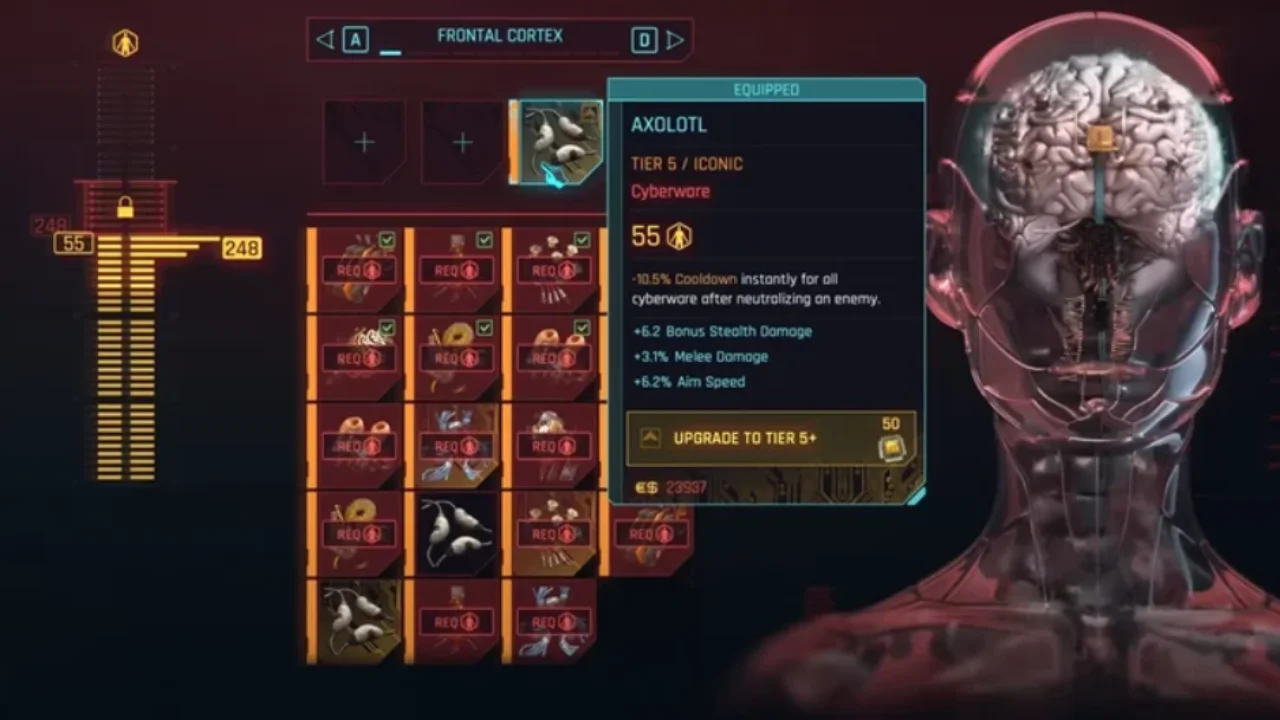
Axolotl
This piece of Cyberware can be unlocked as a reward for completing all of Regina Jone’s gigs or bought from Ripperdocs in Dogtown. Spend the 50 Tier five components and you will have a 12.5% cooldown for all cyberware including the centerpiece of our build, i.e., the sandy. There is an issue with this cyberware, i.e., it is very costly in terms of cyberware capacity, so use this if a practically infinite sandy charge is crucial, otherwise, you could invest in cyberware like the “Chitin” which drastically improves armor (more on this later).
Newton Module
An alternative to Axolotl is its non-iconic counterpart, the “Newton Module”, which will only offer a 1.35% cooldown reduction per neutralization once fully upgraded to Tier 5++. This downgrade from the Axolotl will be noticeable at least a few times in your playthrough, though you will be able to invest the available cyberware capacity in other iconic cyberware like the “Chitin”.
Chitin
This cyberware is part of the Integumentary System Cyberware (Armor and Damage Resistance). It gives 200 armor as well as a 10% health regeneration rate per body attribute point.
This can be used instead of the “Axolotl” as it will allow you to withstand attacks that would otherwise flatline you if the sandy goes dry, so go with this option if you want a higher survival rate on harder difficulties while trying to evade or dodge out of a fight.
ProxiShield or Peripheral Inverse
An important aspect of this sandevistan build is the melee combat and for that you will need to get up close to your targets. “ProxiShield” and its iconic version “Peripheral Inverse”, are for the Integumentary System, both do the exact same thing. A fully upgraded Proxishield will reduce incoming damage by 20% at 3 m and by 6 m damage reduction vanishes, in comparison to this, a fully upgraded Peripheral Inverse reduces incoming damage by 45% at 3 m and tapers off to 0% reduction at 6 m. The uniconic version costs 8 cyberware capacity points whereas the iconic version costs 40 so it might be better to go with the plain Proxishield.
Shock and Awe
The Shock-n-Awe is Cyberware for the Integumentary System and once fully upgraded, it has a 10% chance to release a large electroshock that deals 500 damage to nearby enemies. For 20 cyberware capacity points, this offers a good means to make a comeback from tight spots at higher difficulties.
Pain Editor or Painducer
Both are for the Integumentary System and either one of these is a good choice for some extra protection. Though on hard or very hard, better to choose “Painducer” as it converts 30% damage from any attack to damage-over-time (DoT), which means it gives you a good amount of time to react to a fatal blow, giving you time to heal. In this comparison, it depends quite a bit on your build If you have high cool – Pain Editor, high body – Painducer, since this build has high body and Painducer is “Body Attuned” which means additional DoT capability per attribute point in the Body perk tree.
Dense Marrow
Dense Marrow is for the Skeleton and when fully upgraded to Tier 5++, it will increase melee damage by 27% but also drain stamina by an additional 15%, however, the stamina cost can be offset by other cyberware such as the adrenaline booster for the circulatory system. The additional melee damage will come in handy, allowing to take down stronger enemies like MaxTac, much quicker.
Epimorphic Skeleton, Parabellum or Bionic Joints
After “Dense Marrow” you can still apply two more upgrades to the skeleton and the best two choices are “Parabellum” and “Epimorphic Skeleton”. Both of these offer significant armor and health buffs. These do cost higher in cyberware capacity so could swap out one of these for “Bionic Joints” which offers less armor buff for a mere six cyberware capacity points.
Adrenaline Booster and Heal on Kill or Biomonitor
“Adrenaline Booster”, “Heal on Kill”, and “Biomonitor” are all for the circulatory system. “Adrenaline Booster” boosts stamina by 25% on every melee kill once fully upgraded to Tier 5++, thereby mitigating the stamina cost of Dense marrow for only 14 cyberware capacity. “Heal on Kill” once fully upgraded to Tier 5++, regenerates 7.5% health on every neutralization, no matter the weapon used, and uses only 10 cyberware capacity. “Biomonitor” will automatically apply your healing item if the health drops below 35%; you could swap this for the “Blood Pump” which gives much better healing than a Bounce Back or Maxdoc, but you will have to trigger it manually. We do not recommend you use both Biomonitor and Blood pump together, use one or the other or you’ll lose two slots in the circulatory system focusing on one thing.
Stabber
“Stabber” is for the nervous system and once fully upgraded to Tier 5++, it will allow a nice 20% critical hit chance with both Blades (katana types) and throwable weapons (like throwable knives). Since it is Reflexes attuned, it adds an additional 0.1% crit chance per attribute point in the Relflexes tree. A good choice for 12 cyberware capacity.
Kiroshi “Cockatrice” Optics
At this point, it’s just beefing up what you can with the cyberware capacity you have left, if you have found a lot of cyberware capacity progression shards from all the NCPD scanner quests you did, go for the “Kiroshi ‘Cockatrice’ Optics’” where you’re aiming for the increased 35% crit chance that comes with this cyberware. If you don’t have the capacity, it is fine to go with the basic Kiroshis.
Projectile Launch System
“Projectile Launch System” is for arms, choose whichever flavor of the projectile launch system you like, chemical, electric, or thermal. With the upgrades like “Doomlauncher” and “Launch Capacity Override”, any of these variants will do the trick against hard-to-reach enemies or large groups of enemies.
Best Weapons for a Sandevistan Build
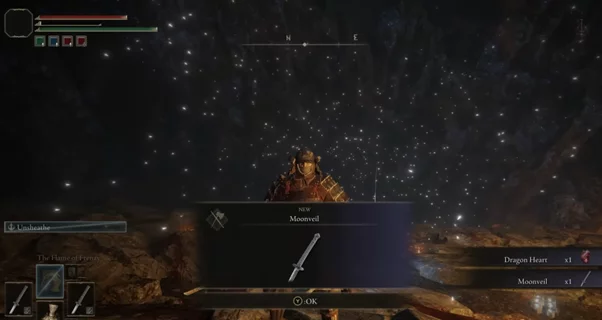
Byakko (Katana)

This katana is one of the centrepieces of this Sandevistan build and arguably the best choice since it allows you to activate a rapid combo mode as you eliminate an enemy. Thanks to entering this rapid combo mode, you will be able to deliver blows at great speeds thereby neutralizing enemies at a high rate, this will constantly regenerate stamina and health thanks to the buffs offered by the chosen perks and cyberware on each neutralization. This effect will allow a nice feedback loop of constantly regenerating health, stamina, and sandevistan duration, allowing an almost invincible build even against extremely difficult foes like MaxTac. This is not to say other weapons won’t work but the rapid combo mode of this one is what completes this build and unlocks its full potential. You must dispatch an enemy for the rapid combo and associated regens to activate so it might be a good idea to first neutralize an enemy of lower health say regular beat cops around MaxTac, before engaging the more beefy foes. You can get this sword as a reward for completing all of Wakako Okada’s gigs.
Scalpel (Katana)
The feedback system of regens via neutralization will not work well if you are up against only high-health foes like only MaxTac and no beat cops or Adam Smasher, in which case “Scalpel” will come in handy since it has an additional 50% crit chance when used with the sandy along with armor penetration and electrical damage. You can get this sword as a reward for completing the “Big in Japan” gig which you get from the Afterlife by talking to a fixer.
Satori (Katana)
The “Satori” can be found in Saburo Arasaka’s AV parked on the rooftop of the Konpeki Plaza in the same “The Heist” gig. This Katana allows you to perform a Quickdraw attack which will cause bleeding however if the “Nehan” has already caused bleeding, the Quickdraw attack will then cause hemorrhaging which not only damages the enemy but regenerates your health. This katana also allows you to perform leap attacks against enemies.
Errata (Katana)
The “Errata” is a unique and visually striking katana as it has a glowing tempered blade. As it’s visual suggests, it has a high burn chance and guarantees crit hits on enemies that are burning. This katana is found in the forge of the Electric Corporation power plant during the mission “Disasterpiece”.
Agaou (Axe) or Nehan (Knife)
In addition to a katana, a secondary long-range weapon should be a part of the arsenal for a good Sandevistan build, and although you could go with shotguns or sniper rifles; if you have unlocked perks specific to throwables like “Juggler” and “Scorpion Sting”, having a legendary throwable like the “Agaou” or “Nehan” will make all the difference while dealing with harder to reach / long range targets like turrets or elevated enemies. Using throwables to deal with ranged targets while using the sandevistan leads to a much more satisfying kill as compared to using a gun with the sandevistan. Agaou can be looted from Ayo Zarinn who drops it in the “Increased Criminal Activity” location in Phantom Liberty; Nehan can be looted from Saburo Arasaka’s corpse once Yorinobu has killed him and left the room and before you start your attempt to escape.