Whether you are a new recruit or a seasoned Helldiver Veteran, there is always room to learn and improve. If you want to show those bugs and the bots that you mean business, these Helldivers 2 tips and tricks are for you.
Helldivers is not just another horde shooter, it is an unforgiving simulation of military tactics where you will dive feet first into hell in the name of Super Earth. Given the difficulty level of Helldivers 2 it is only natural that there might be somethings that people overlooked or did not grasp yet. this Tips and tricks guide will tell you everything you should know before you start playing Helldivers 2.
Use Railgun in Unsafe Mode
Now I am sure you’re asking, “These are tips for playing better right?”, cause overcharging the railgun for even a frame longer than its limit will result in its detonation and your death. To answer your question, yes, these are tips for playing better, and this one is among them.
The Railgun is one of the best support weapons in the game right now since it is effective against all enemy types, due to its substantial ammo capacity and massive damage dealt with each shot, even in safe mode. Switching from safe to unsafe mode will allow you to squeeze out the maximum possible damage from each Railgun shot which can be a game changer on high difficulties since you will be facing heavies frequently and taking them down quickly will make all the difference.
Charging the Railgun to capacity takes almost three seconds before it explodes, it is, of course, unreasonable to somehow count that each time you’re trying to fire a shot with it. To be real, you will die a few times trying to master the Railgun in unsafe mode but what you’ll lose is nothing compared to what you’ll gain in combat effectiveness at higher difficulties, once you do achieve mastery of unsafe mode.
Look for Super (Pink) Samples
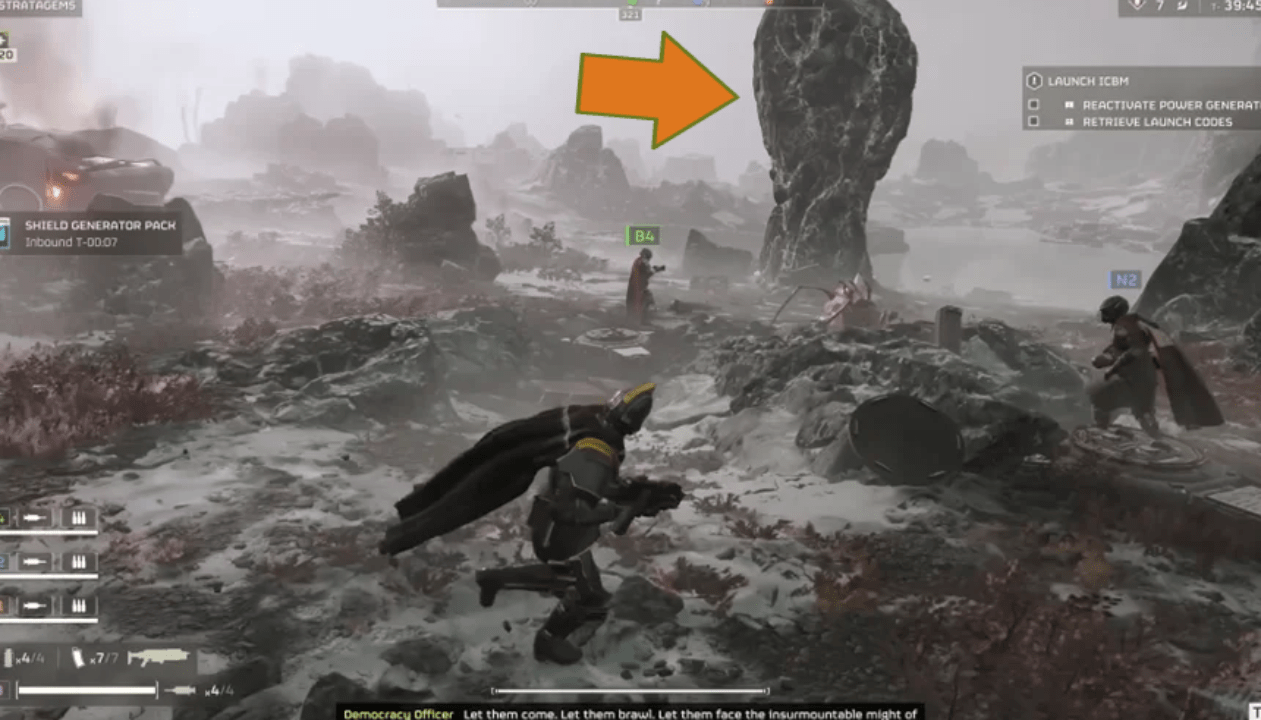
Aim and strategy are only part of the success formula for Helldivers 2. To spread democracy and liberty, you need to effectively use stratagems and at the highest difficulties, you need to have upgraded stratagems as each second wasted in a long cooldown can mean your end. The best ship modules, that augment your stratagem performance the most, require super (pink) samples to unlock. Super samples are only available in missions of difficulty 7 (suicide mission) and above, moreover, in the current state of the game, all super samples you can find in the mission are bunched together in one place, near an oddly shaped rock. So, in the mission of difficulty seven and above, look for the interestingly shaped rock, where you will find all the super samples bunched together.
Related
Learn about all the Currencies in Helldivers 2 and how to get them
Have One Player Carry All Samples
Mission rewards are shared among players so why try to carry it separately? A much better approach to protecting your sample haul is to give it to one team-mate for the duration of the mission. There are two advantages to this approach, the first is that if that team-mate dies, only one corpse has to be located and looted to recover all samples, and the second is that it’s much easier to cover and evacuate that one sample carrier during extraction once the mission is complete.
Adjust Stratagem Keybinds
If you’re playing on PC, your movement keys and stratagem input keys are the same by default. It is best if you shift the stratagem inputs to the arrow keys instead of WASD as this will allow you to continue moving whilst putting in the combination for your stratagems, this can make all the difference at higher difficulties.
Plan and Remember Your Artillery Shell Sequence
Your map might have SEAF Artillery Stations, which you can clear as a secondary objective. Apart from the obvious extra points for completing a secondary objective, the SEAF Artillery gun will act as an extra stratagem for you to call in for the remainder of your mission. To call in these additional artillery strikes you must load the canon with the different shells lying in its vicinity. There are five types of shells you will find near the canon:
- Mini Nuke – Yellow Round Top
- Explosive – Red Round Top
- Napalm – Red Pointy Top
- Static – Blue Pointy Top
- Smoke – Yellow Pointy Top
The order in which the shells have been listed above is how you should load them into the SEAF canon since it is likely that you’ll want to blow things up more than hide behind a smoke screen. Another key thing is to remember the order you load the shells since no HUD element will tell it to you once you move on from the artillery canon.
Bring Stratagems to Kill Heavies
While some team-mates should focus on carrying weapons and stratagems for crowd control, one or two helldivers on the team must also bring support weapons or stratagems specifically for dealing with heavies such as Bile Titans and Tanks quickly. The Orbital Railcannon and the Orbital Laser are solid options against these heavies, each with its set of pros and cons.
The Laser is good since it automatically adjusts to a new target if it takes one out and lasts a relatively long time. The problem with the Laser is that it has a rather long 300-second cooldown time. On the other hand, the Railcannon is good for its instantaneous deployment unlimited uses, and a relatively low 210-second cooldown time. The problem with the Railcannon is that it only targets one enemy.
Use Mortars for Defend Area Missions
In the defend area missions, your team is deployed on an elevated position and you have to repel enemy forces. If all members stack up on the Mortar Sentry and EMS Mortar Sentry stratagems, then all of these mortars firing in different directions simultaneously will allow you to sit back and watch the show as they make easy work of bugs or bots. Even at the highest difficulties, automaton hulks and tanks won’t need intervention thanks to your mortar setup.
Bring Stratagems to Destroy Outposts
While part of the team should load up specifically to deal with tanks and titans, the other members should focus on arming themselves to efficiently eradicate outposts which include bug holes and bot factories. Though it is possible to destroy these targets by throwing grenades in these targets, that would require you to get up close and personal with the bugs and bots in their backyard, and risk getting swarmmed while practically standing still as you line up that perfect grenade throw.
The grenade approach is a death sentence at higher difficulties as the risk of getting swarmed is too high. Fortunately, you can use stratagems to destroy these outposts without getting too close. Eagle stratagems such as Eagle Airstrikes are ideal choices for taking out these outposts as they have negligible deployment times and practically unlimited uses throughout the mission as long as you keep sending your eagles to rearm.
Hellpods are Anti Heavy Weapons
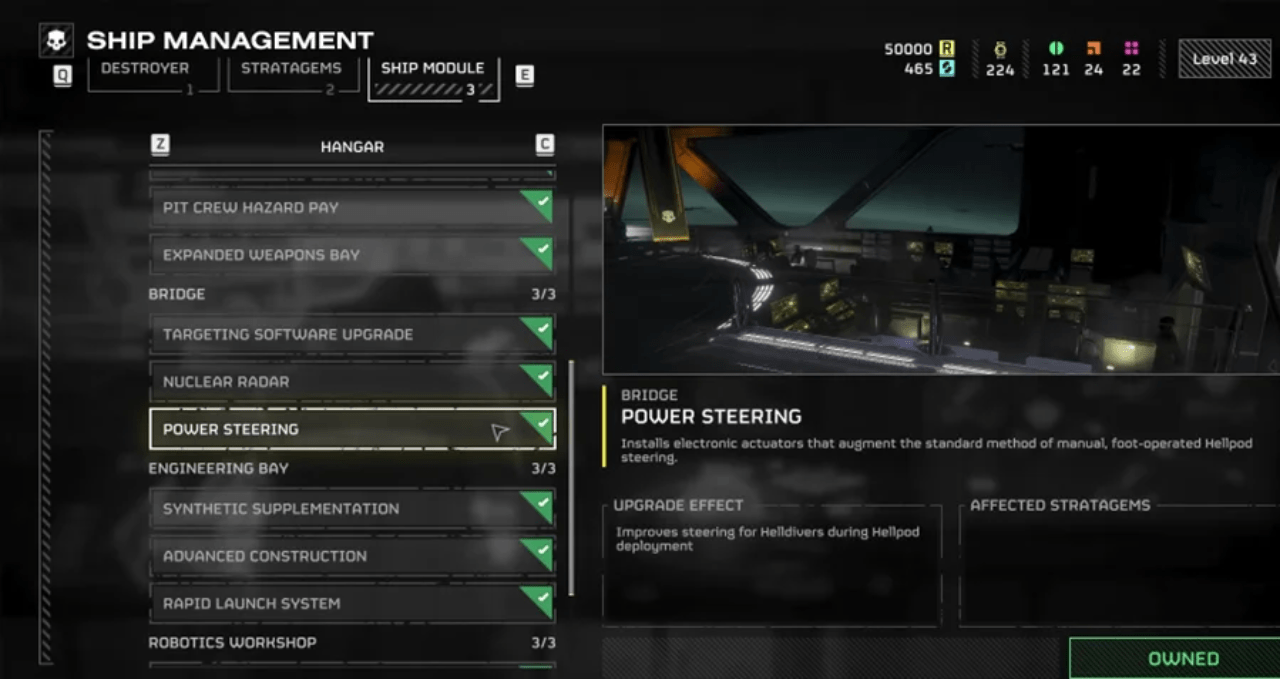
Before you throw in a reinforce stratagem, ask the team-mate if they can manage to be deployed right in the thick of battle. If they are short on ammunition and gear, then best throw the stratagem away from enemy exposure. If however, the team-mate obliges, throw the reinforcement stratagem as close as possible to the biggest target in the battle-field, preferably a titan or a tank. The Hellpod insta-kills any enemy it directly drops on, which makes it an extremely effective weapon. If you want to use your team’s Hellpods as part of your offensive arsenal then it is best that you unlock the Power Steering ship module which offers the incoming helldiver much better directional control over the Hellpod as it drops.
Different Strategies for Different Enemies
There is a difference in how you should deal with bugs and bots. With bugs, constant movement and drawing them out in open areas works great as they predominantly rely on melee combat, have weak ranged attacks, and even though chargers can rush you, they are easy to dodge and stop with the Railgun. With bots, constant movement works but leading them out into open spaces is a big mistake since they have good ranged attack options such as lasers, rockets, and grenades. Against bots, you want to keep moving, but from cover to cover, as that will allow you to break their line of site, avoid getting one-shotted by their projectiles, and force them to get closer to you making it easier for you to take them out with your shotgun.


